

Deploy to an environment
The deployment environment view is the central space for managing deployments. It is divided into three zones: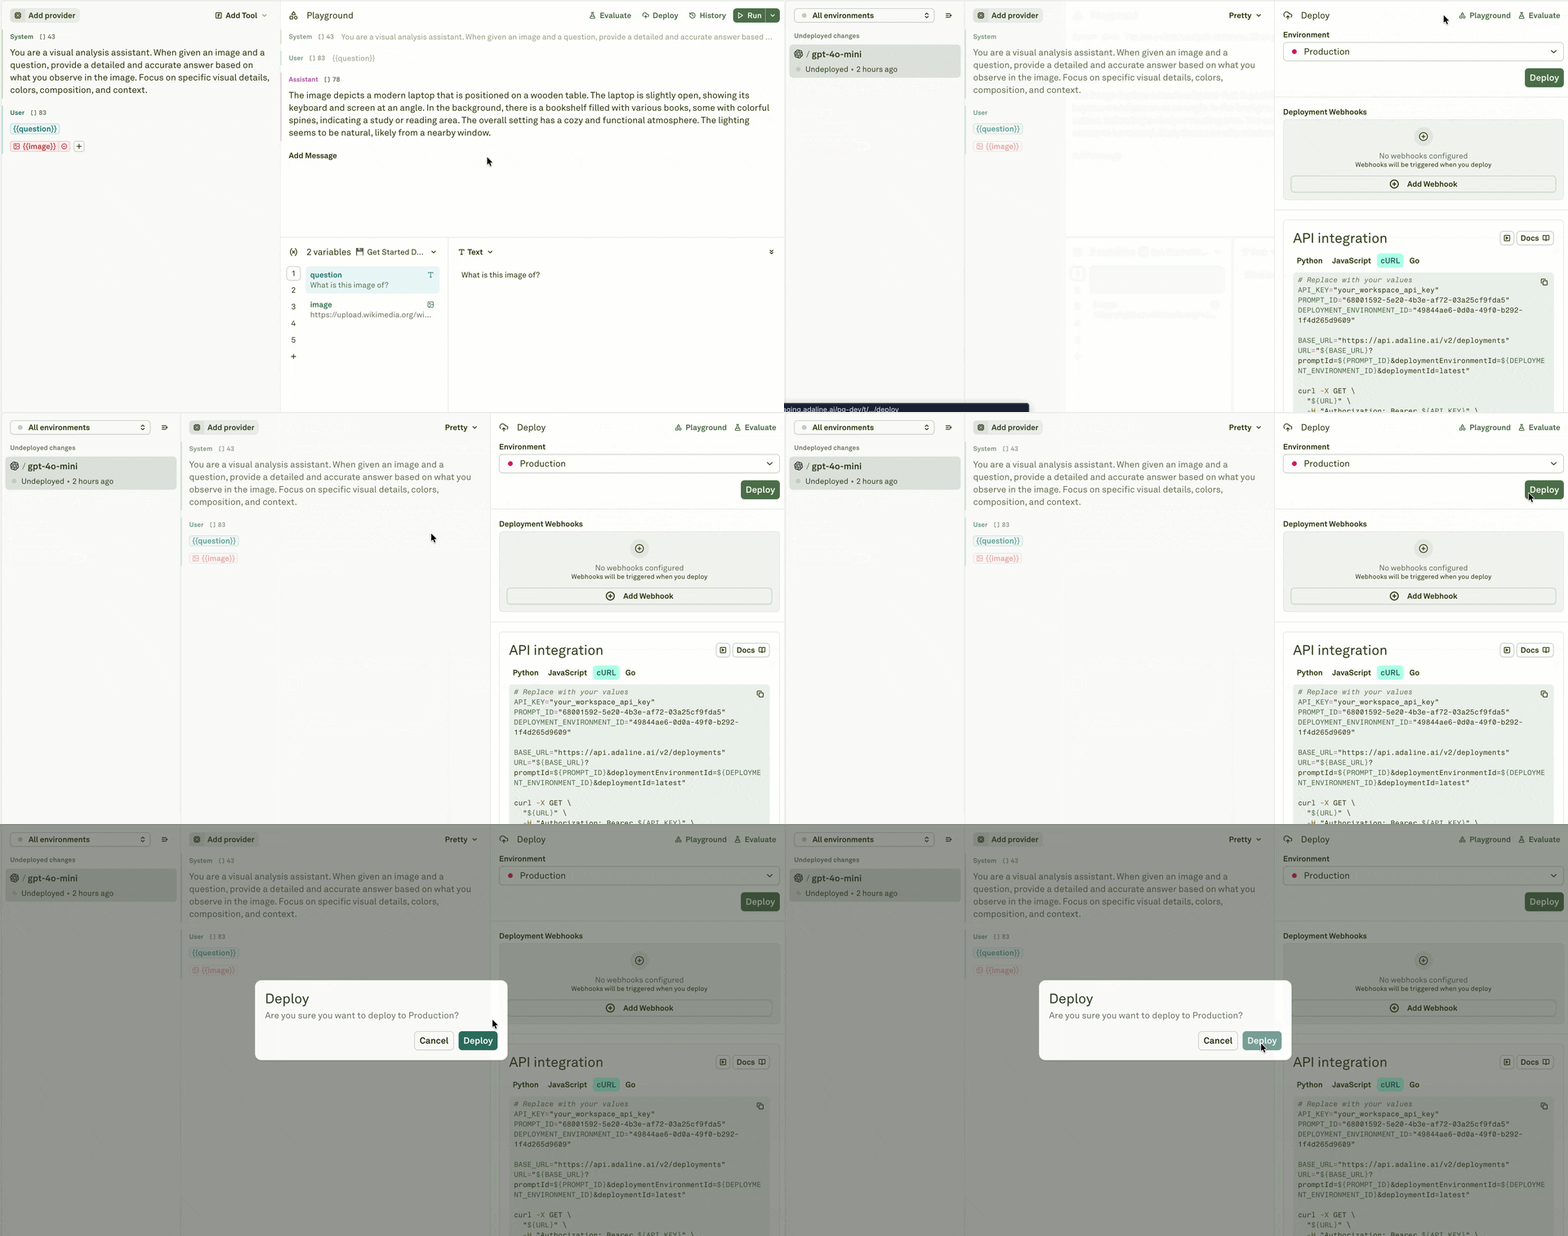
The banner at the bottom shows the deployment direction (e.g., Editor -> Production). This is a visual indicator of what you are about to deploy — it is not clickable.
Confirm the deployment
When you are ready, click Deploy to push the prompt to the selected environment: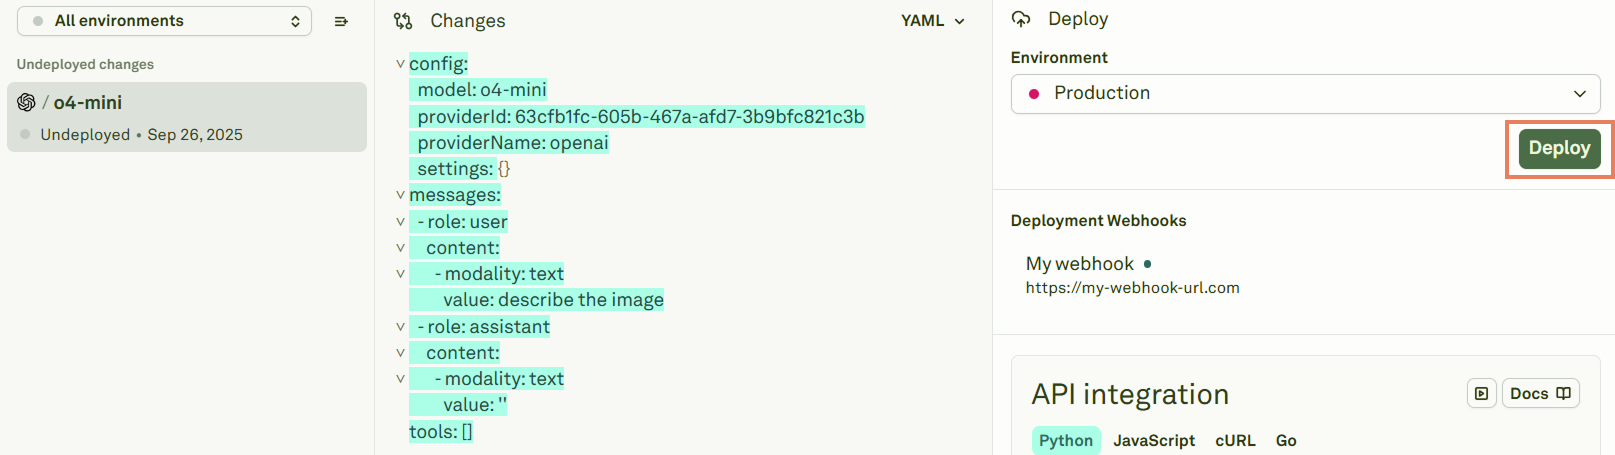
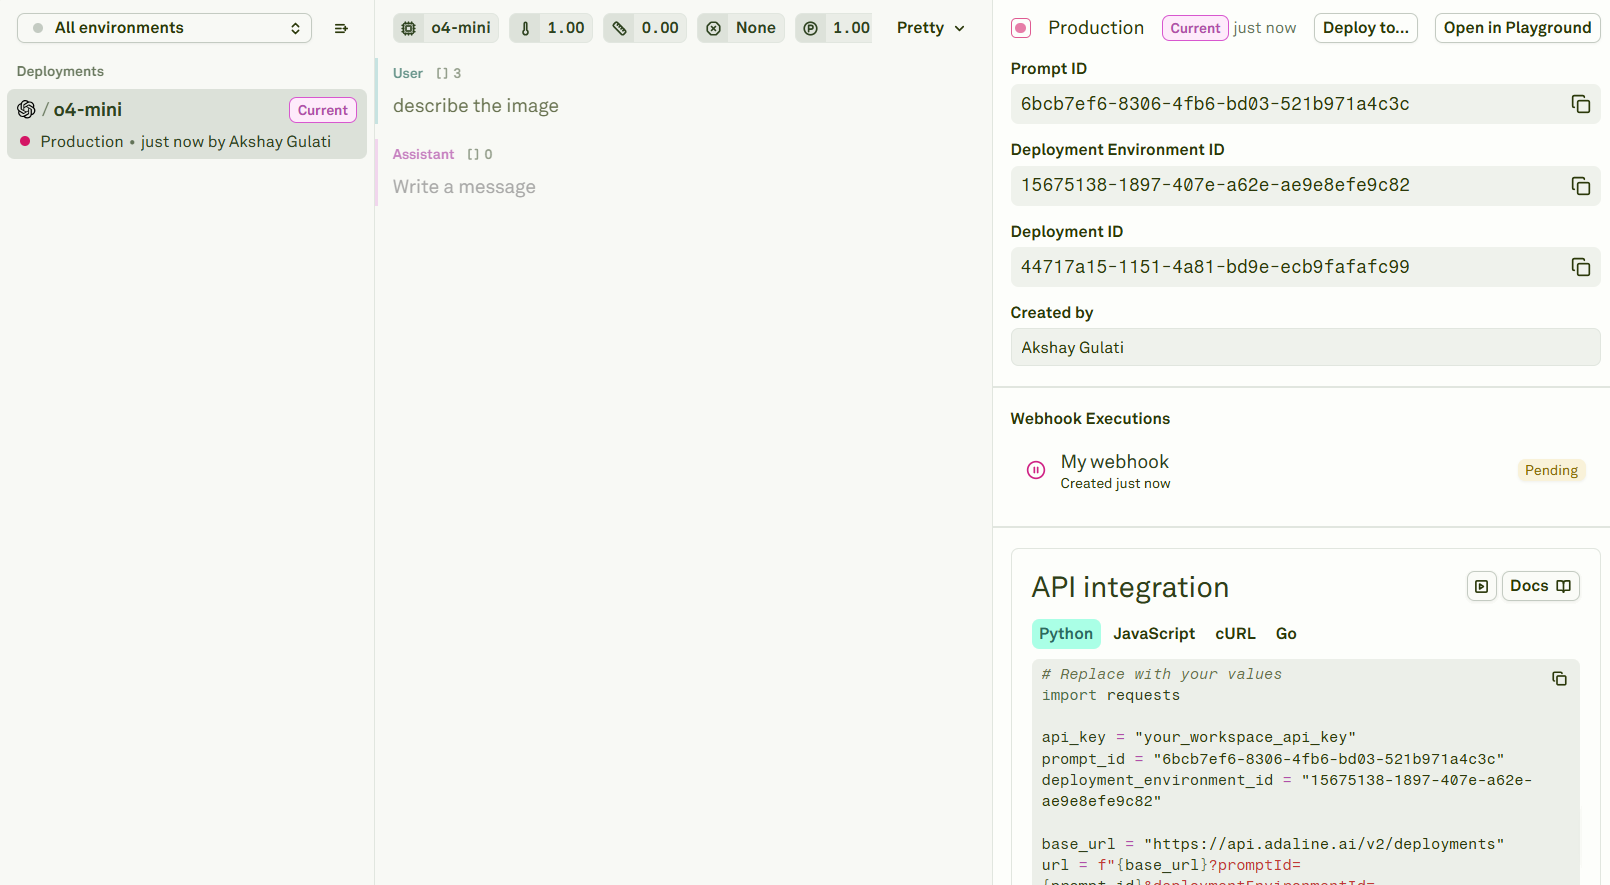
- Integration IDs — Deployment snapshot ID, environment ID, and prompt bench ID for use in your API/SDK calls. Adaline auto-fills the code snippets in the API Integration section.
- Webhook executions — Status of any webhook deliveries triggered by the deployment.
Deploy to another environment
To promote a prompt from one environment to another (e.g., staging to production), select the prompt and click Deploy to…: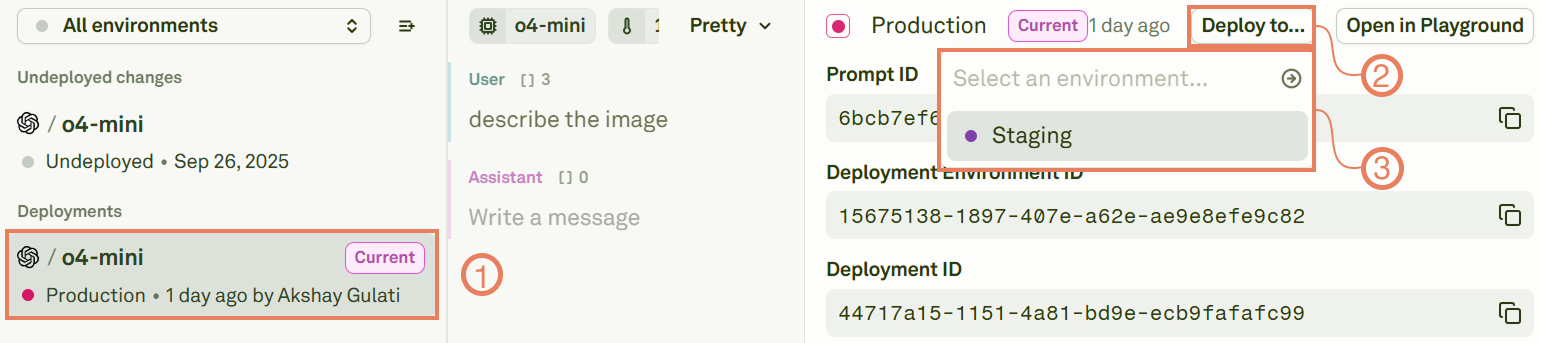
- Staging -> Production — Promote a tested prompt to your live application.
- Production -> Staging — Pull a production prompt back to staging for further testing or iteration.
Access deployed prompts
After deployment, your AI application can access the prompt via:- API — Use the Adaline REST API with your environment key and deployment IDs.
- SDK — Use the TypeScript or Python SDK to fetch and execute deployed prompts.
- Webhooks — Configure webhooks to receive real-time notifications whenever a deployment is created or rolled back.
What gets deployed
A deployment captures a complete snapshot of your prompt, including:
Here is a sample deployment object returned by the API and SDK: